Residential Solar Panel Installation on the Central Coast: How the Job Really Goes
A rooftop solar array looks simple once it is up there — neat rows of black panels quietly catching the sun. The part that decides whether it actually performs for the next twenty years happens before and during the install, mostly out of sight. Knowing how the job runs from start to finish helps any Central Coast homeowner read a quote properly and spot one that has skipped a step to come in cheap.
Step One: The Site Assessment
Every good install starts on the ground, not the roof. The installer checks your roof type — tile or Colorbond — along with its orientation, pitch and condition, then works out the usable area that is genuinely free of shading from trees, chimneys, water tanks or a neighbour's two-storey extension. Shading matters more than most people expect, because even a small shadow across part of an array can pull down output well beyond the panel it touches.
They also open up the switchboard and check the meter to confirm what the system can safely connect to. This first look is where problems get found early, while they are still cheap to solve — a tired board, a roof that needs a repair first, or limited space that changes the design.
Step Two: System Design and Quote
With the roof measured and your power use understood, the system is designed properly: how many panels, exactly where they sit, which inverter suits the layout and your plans, and how the whole thing ties back to the board. A proper quote spells out the panel and inverter brands, the array layout, the inclusions, and what the system is expected to generate. If a quote is a single headline number with no detail behind it, that is a flag worth questioning before you sign anything.
Step Three: Network Approval
Before anything goes on the roof, the local network provider has to approve the connection. This protects the grid and sets how much power you are allowed to export back into it. It is paperwork your installer lodges and manages for you, but it does add time to the front of the job — which is worth understanding so the overall timeline makes sense and nobody is left wondering why install day is not tomorrow.
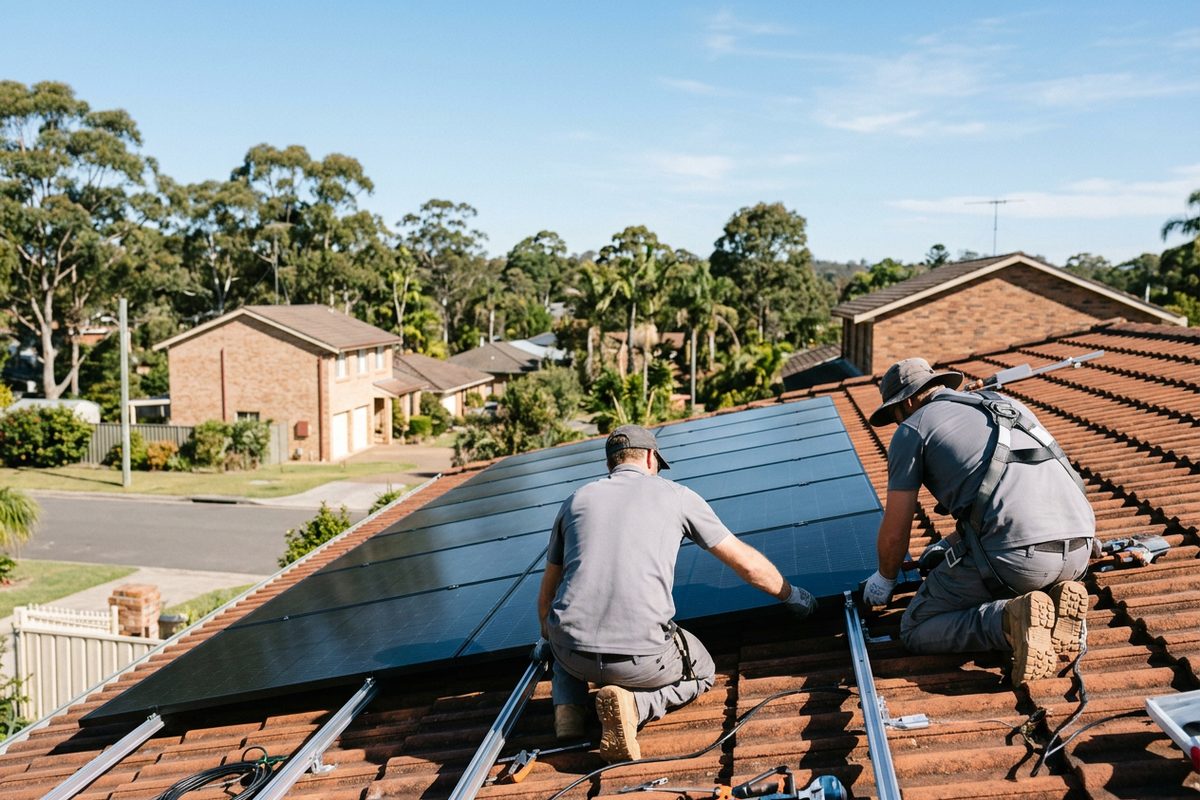
Step Four: Installation Day
The physical install is usually the quickest part of the whole process. Mounting rails are fixed to the roof structure — not just hooked over tiles or screwed into sheeting — then the panels are mounted flush and wired back through a rooftop DC isolator to the inverter, and the inverter through to the switchboard. A tidy job keeps cabling concealed in the roof space or run in fully enclosed conduit, with nothing loose strung across a wall. The inverter is mounted somewhere ventilated and out of the harsh western afternoon sun, which shortens its life if it cooks all summer.
Step Five: Commissioning and Switch-On
Once it is wired, the system is tested, the meter is reconfigured to measure both what you draw and what you export, and the installer walks you through the monitoring app so you can actually see what your roof is making day to day. You are handed the compliance certificate and the warranty documents at the end — and these are worth keeping somewhere safe, because they are what you reach for if output ever drops, if you add a battery later, or when you sell the house.
What Sets a Good Install Apart
The difference between a system that performs for decades and one that disappoints in five years is rarely the panels on the label — it is the design, the mounting and the wiring. Rails anchored correctly, isolators rated for the coast, conduit run neatly, and an inverter sited sensibly all sound like small things. Added up, they are the whole difference, and they are exactly what a rushed or underpriced job tends to cut.
Frequently Asked Questions
What's involved before installation day?
A site assessment, the system design, your acceptance of the quote, and network approval from the electricity provider. Most of the lead time sits in those approvals rather than the physical work, so the build itself is usually fast once everything is cleared.
How disruptive is the install itself?
Less than most people expect. Your power is off only briefly while the system is tied into the switchboard, and the crew works mostly up on the roof. A standard residential system is typically a single-visit job done within a day.
What should I keep afterwards?
Your compliance certificate, the panel and inverter warranty documents, and your monitoring login. These are what you rely on if performance ever drops, when you add storage, or at sale time.
Does the roof need to be in good condition first?
Ideally, yes. Panels are designed to stay up for decades, so it is far better to address an ageing or damaged roof before the array goes on rather than having to remove and refit panels later. The site assessment flags this early.
Thinking About Solar for Your Central Coast Home?
Get a free, no-obligation system design from a local licensed installer who serves the Central Coast. We will assess your roof, size the system to your usage, and quote it properly before any work starts. Chat with our team to get started.